Motivation
I switched my distribution of choice to OpenSUSE. There are a lot of motivations behind this choice:
- I wanted an enterprise-grade quality of software in terms of stability, package choice, and supportability
- Growing interest in software non-distribution specific and/or customized, e.g. Gnome
- Dogfooding
After nearly one year of usage, I can say that I am mostly satisfied with the setup I built.
In this post I will cover a step-by-step advanced installation of OpenSUSE: we are going to mimic the exact setup I have on my machine. I want to share the setup first of all for myself, keeping track on why I did some decisions back then, and secondly for you, fellow readers: you can follow my example and setup a successful OpenSUSE box.
Leap or Tumbleweed?
OpenSUSE comes in two variants:
Leap: represent the stable branch. It’s a fixed schedule release, which means that a release comes out from time to time. You pick a release, and install it: every update is based on the release version.
Tumbleweed: represent the bleeding-edge branch, and it’s a rolling release (which means that you install a snapshot of that branch and apply updates from there on).
On my machine, I always want stability over the bleeding-edge version of the latest package, so I choose Leap. Leap has version number 42: as the time of writing, two releases have been made available to the public:
- 42.1 (released 2015-11-04)
- 42.2 (released 2016-11-16)
Let’s download 42.2 (the most recent one), burn it to a USB key (or a DVD, if your computer still has it) and follow the instructions.
This post will not cover every choice. I will just point out what I changed from the default. If nothing is mentioned here, it means I followed the default.
Installation choices
Offline install
Install the distribution in offline mode: if you use your laptop in clamshell mode, disconnect everything (even network): I want to install the distribution as it has been released (potential updates will be applied after the installation).
Network Settings
I enforce a static hostname and domain name. Feel free to name your machine and domain name, and check “Assign Hostname to Loopback IP”.
Partition layout
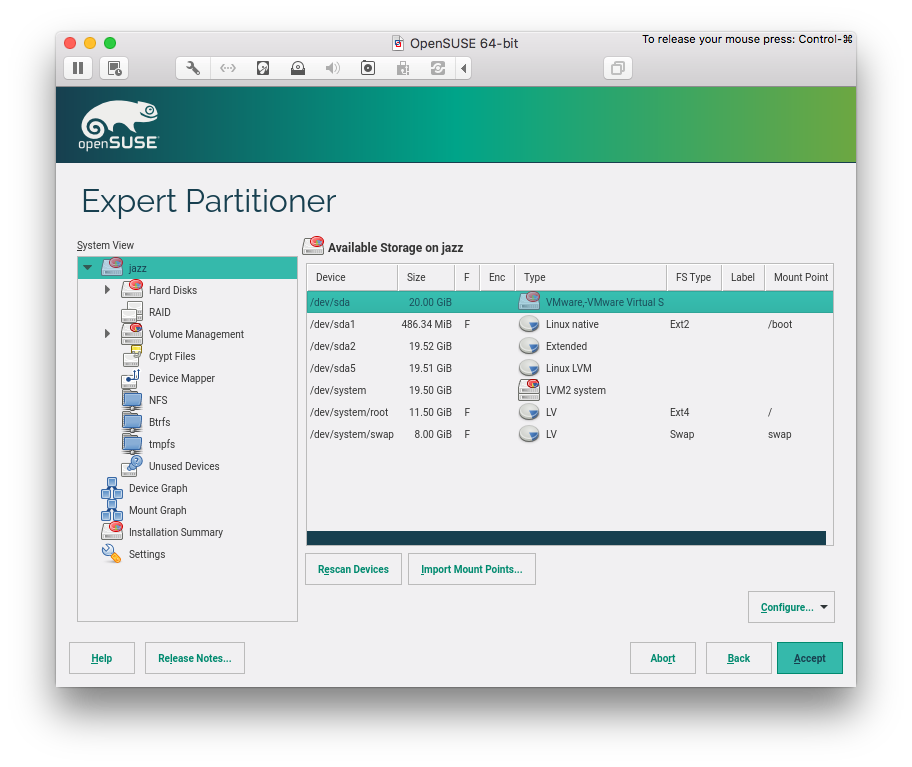
Base partitioning: /boot and LVM
For maximum compatibility, I want my hard drive partitioned with:
- a primary partition that will contain
/boot - an extended partition with 0x8E (Linux LVM) with a
systemVolume Group (VG) and at least two Logical Volumes (LV)
/boot
/boot should be an ext2 partition type and separated from the LVM partition (in case I need to take out my hard-drive and insert in another computer, this ensures compatibility with legacy BIOSes and older computers). The partition should be sized (roughly) at ~500 MB – I choose 487 MiB (1 Megabyte = 0.953674 Mebibyte).
Linux LVM
I use LVM everywhere for easiness of partition shrinking, growing, moving, etc. There is no motivation for not using it. If your BIOS support hard drive encryption, enable it there. If not, use encrypted LVM.
LVM should have a VG named system that must have two LVs:
rootthat will contain all your data (I normally do not need a separated/homepartition)swapthat will act as swap (this will be useful when you use suspend).
For a system with more than one hard drive, I also create another VG (e.g. storage), or add them to system. Unless you use XFS, there is no need to do a final decision here (more on this in the following paragraph).
root LV file-system
I am a great fan of XFS. Over the many advantages of it, there is one major disadvantage: an XFS partition cannot be shrunk.
So, think carefully here: if you think you are going to shrink your partition in the future for every reason, I would advise against XFS. Otherwise, go for XFS.
In my experience, the aforementioned is non-existent for servers, although it can happen for desktop and laptop machines. For my main system I will not choose XFS, thus I will go with ext4.
swap LV size
A long time ago we reserved twice the size of RAM to the swap partition. Nowadays most computers have >= 8 GB of RAM, so I will just choose the same amount of RAM size for my swap partition.
Clock and Time Zone
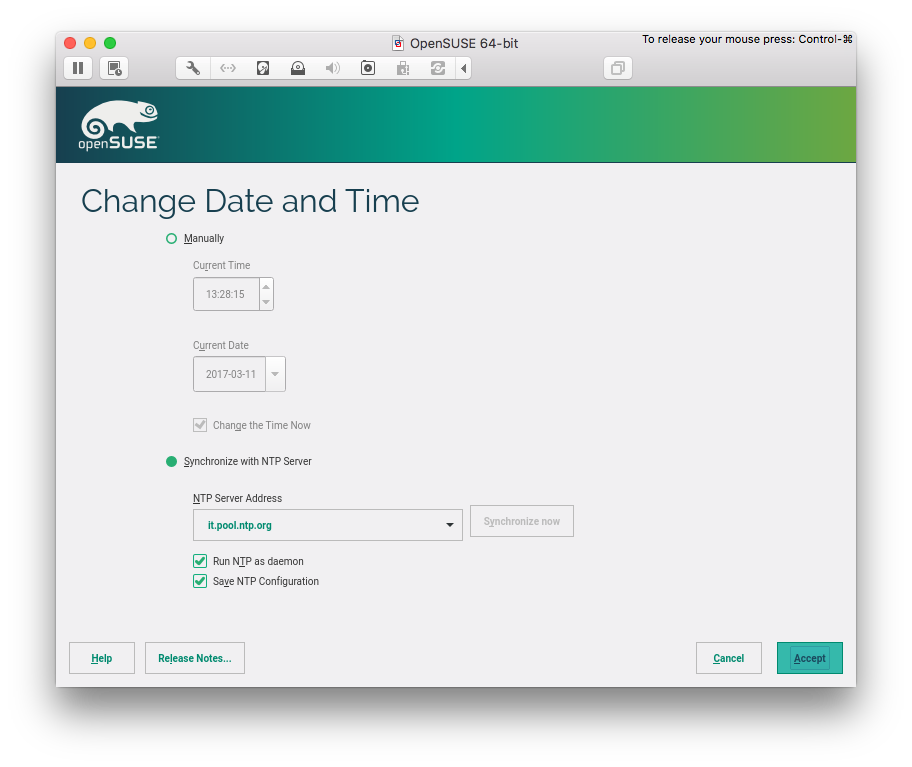
I synchronize my system with an NTP server, and I chose to run NTP as a daemon for my system, saving the configuration.
Desktop selection
I usually go with Gnome or XFCE (it is a personal preference here so feel free to choose another one). During our customization (in the next post) we are going to also install i3, another great window manager that I like a lot.
Local User
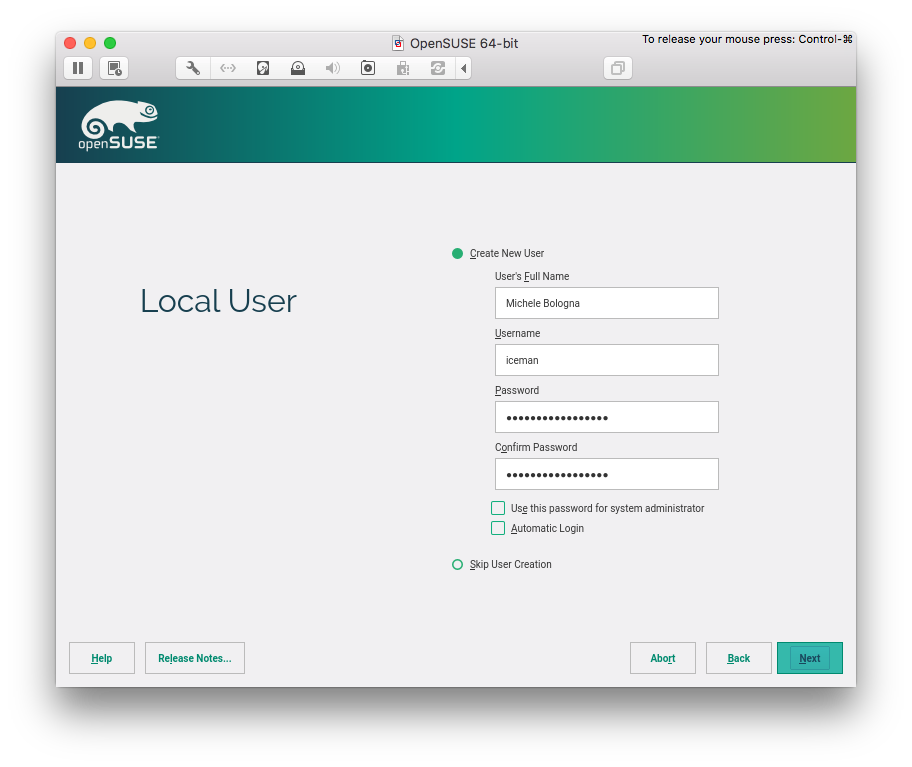
My local user should be distinguished from the system administrator (root) account, so I deselected “Use this password for system administrator”. Of course, this will mean that root account will have another (different!) password.
And I also do not want automatic login.
Boot Loader Settings
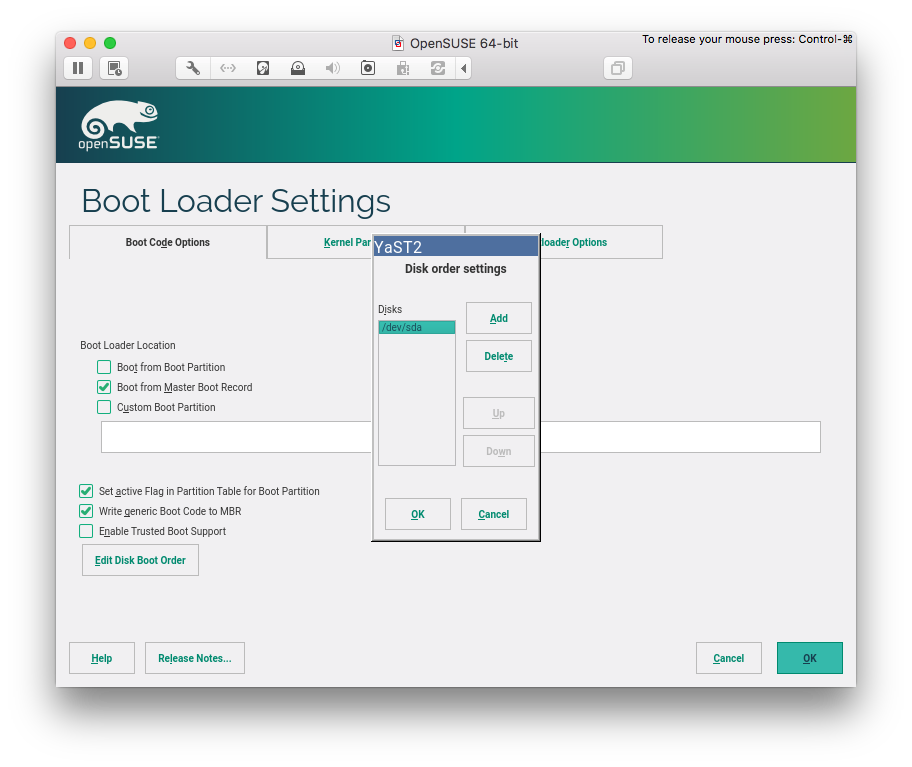
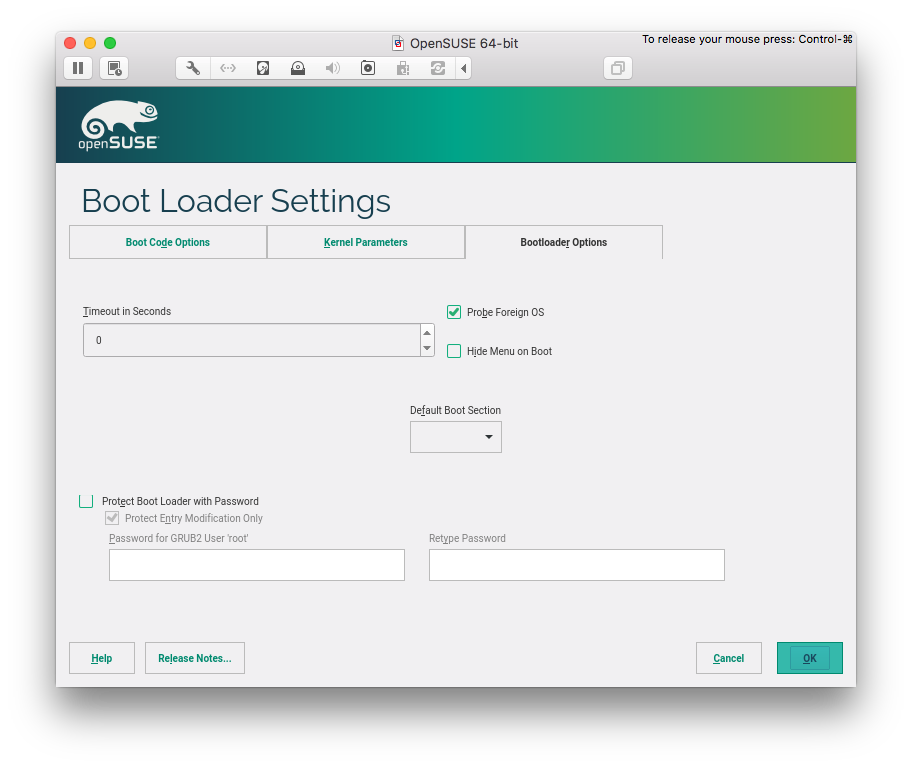
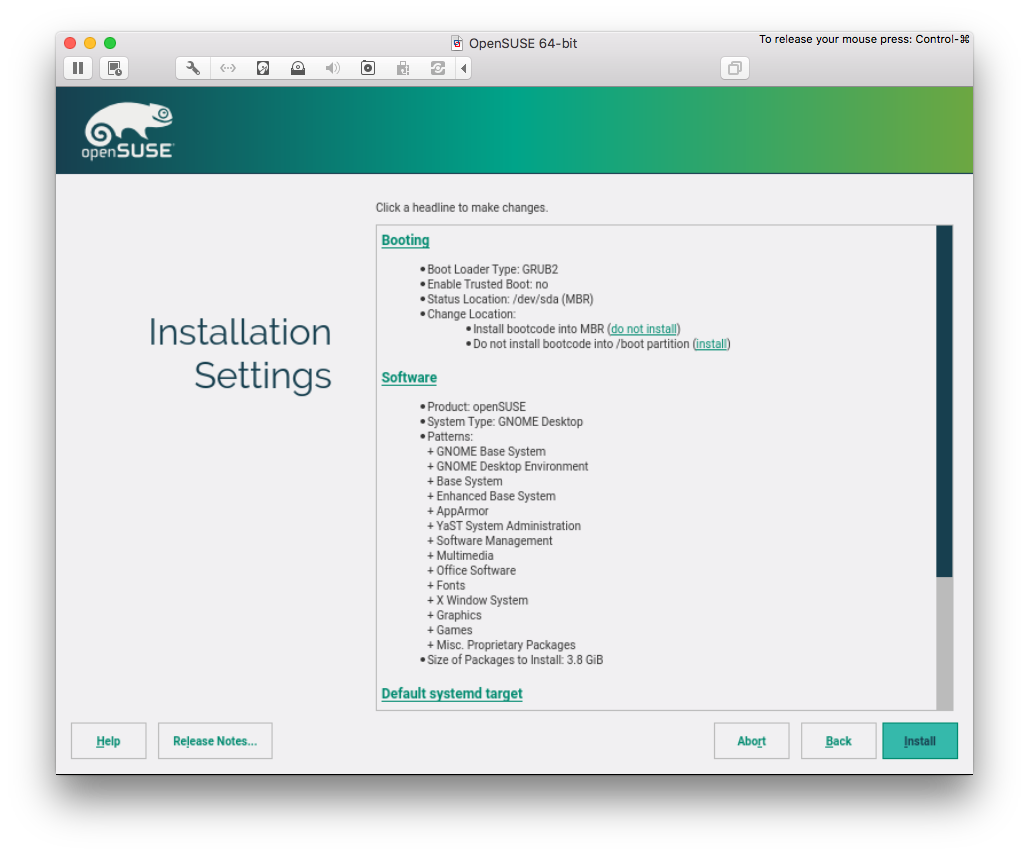
GRUB2 should be installed into Master Boot Record (MBR) and not into /boot. If you are installing via USB key, make sure to remove it from “Boot order”. Optional: set timeout to 0 in “Bootloader Options” (so you do not have to wait for booting).
Software
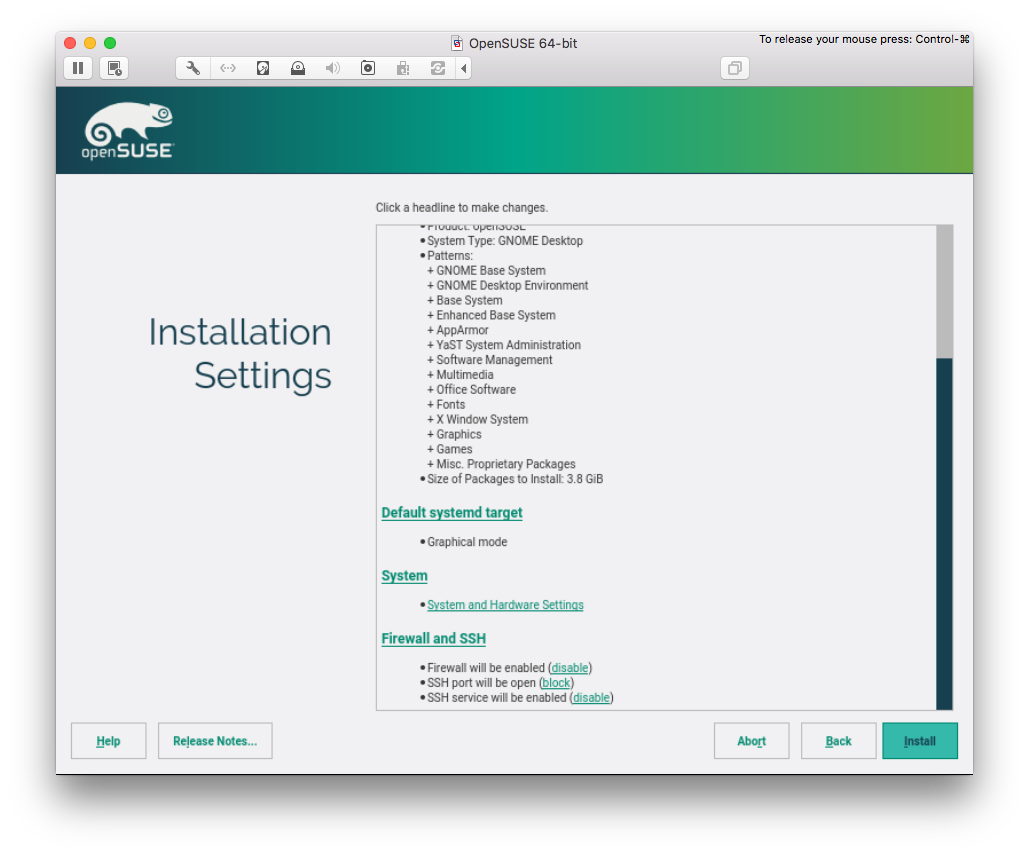
Just go with the default selection, or, if you cannot wait, go ahead and select packages. There is no rush, though: we will install packages that I need in the next post, during the customization phase.
Firewall and SSH
I suggest to unblock SSH port and enable SSH service. WARNING: make sure to config your ssh daemon properly in order to allow only key-based logins.
Conclusion
After the installation, we have a plain Gnome environment ready to rock. In the following post, we are going to customize every bit of it, installing all the packages that I think fundamental. Stay tuned!

